Despite what you might think about smartphones when it comes to outdoor photography, they can, in some instances, do exactly what a DSLR can do.
I know. Mind-blowing.
Now, obviously, there are some instances where a DSLR eclipses a smartphone, but I reckon you don’t need necessarily need a DSLR to get a great picture whilst hiking and this is where iPhone photography can be super handy.
One example of this is that misty/streaky effect in a waterfall/river/ocean you might see in some people’s photos that they’ve taken with a DSLR.
You might ask yourself: “how on Earth am I going to get my pics looking like that when all I’ve got is an iPhone?!”
Well, this iPhone photography hack is exactly what I’m going to show you in this blog. And the good news is that it can be done in just a few steps.
***Please note: this trick works with iPhones but I do believe there are some apps for Android out there that allow you to do this***
Step One
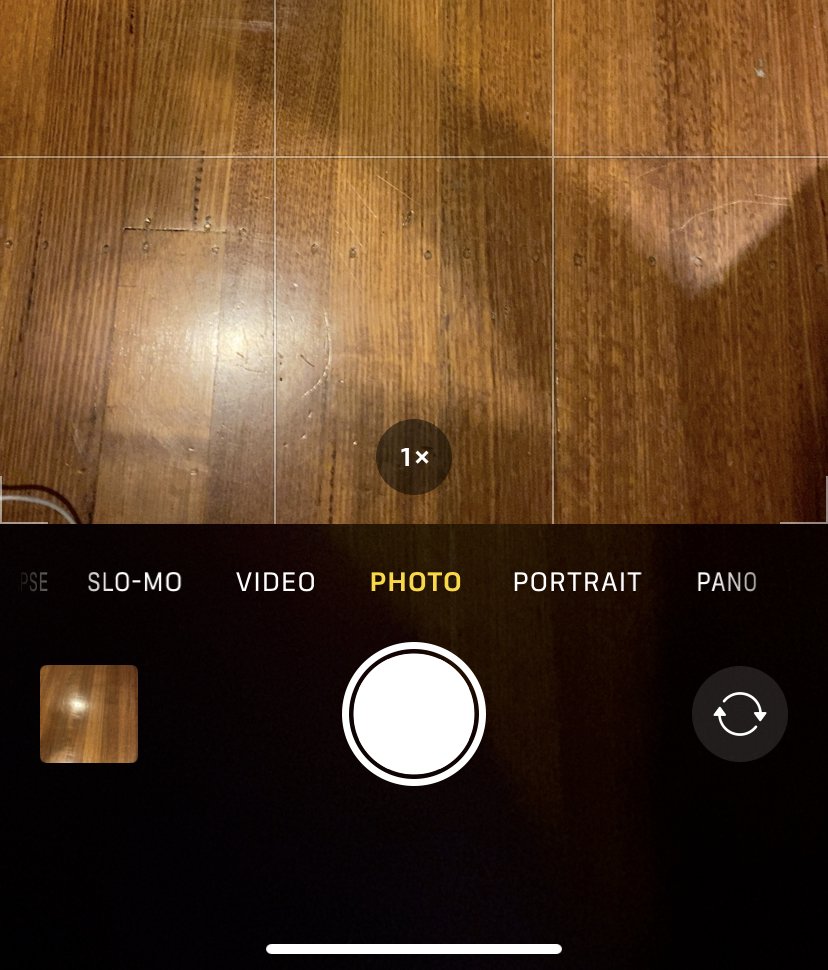
The first step to making this happen is to open up your Camera app and keep it on the Photo option.
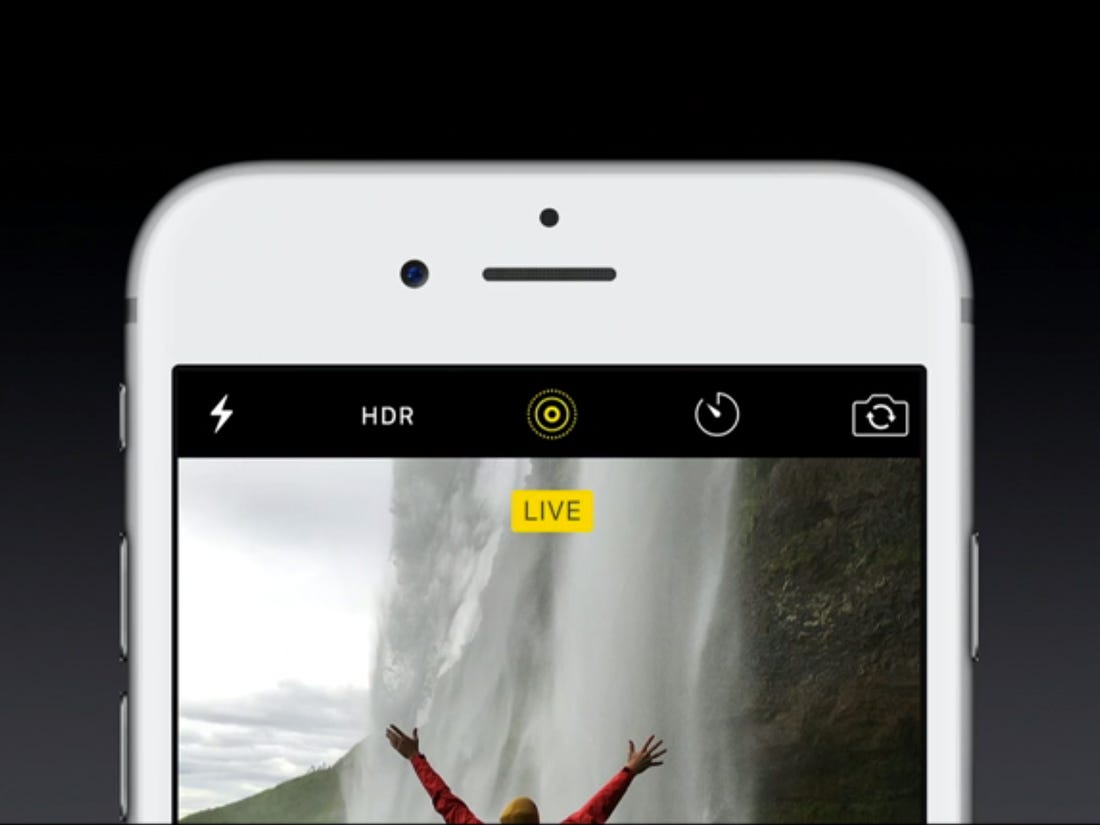
At the top of the screen, as per the image above, you’ll notice a set of white circles with a diagonal strike through it.
When you tap that circle, it will become yellow, the strike will disappear and you’ll now be in Live mode.
You are now ready to take your photo.
Step Two
As previously mentioned, to get that misty/streaky effect you’ll need to take a photo of a moving body of water such as a waterfall, river, or ocean.
Using a steady hand, point and shoot as either a Landscape or Portrait and take your photo.
Step Three
This is probably the most important part of getting the particular effect that you’re after.
Once the photo has been taken it will be automatically sent to your iPhone’s album.
However, to access the Long Exposure setting to get that misty/streaky effect, you need to access said photo via your Camera app rather than exiting and going to your Photos app.
You can access this photo by clicking on the thumbnail in the bottom left-hand corner of the Camera app.
Step Four
After clicking on the small thumbnail, it’ll bring you to a larger version of the picture you’ve taken which, as it was taken in Live mode, will slightly move.
To access the Long Exposure setting, swipe up on the photo and you’ll see a bunch of effects including Live, Loop, Bounce, and Long Exposure.
Click on Long Exposure and the iPhone will slightly zoom in on the photo and add a Long Exposure effect to the moving aspects of the image – in this case, the moving body of water.
Below is an example of what an image will look like post-Long Exposure. The non-moving elements are nice and clear whilst the water has that misty effect to it.
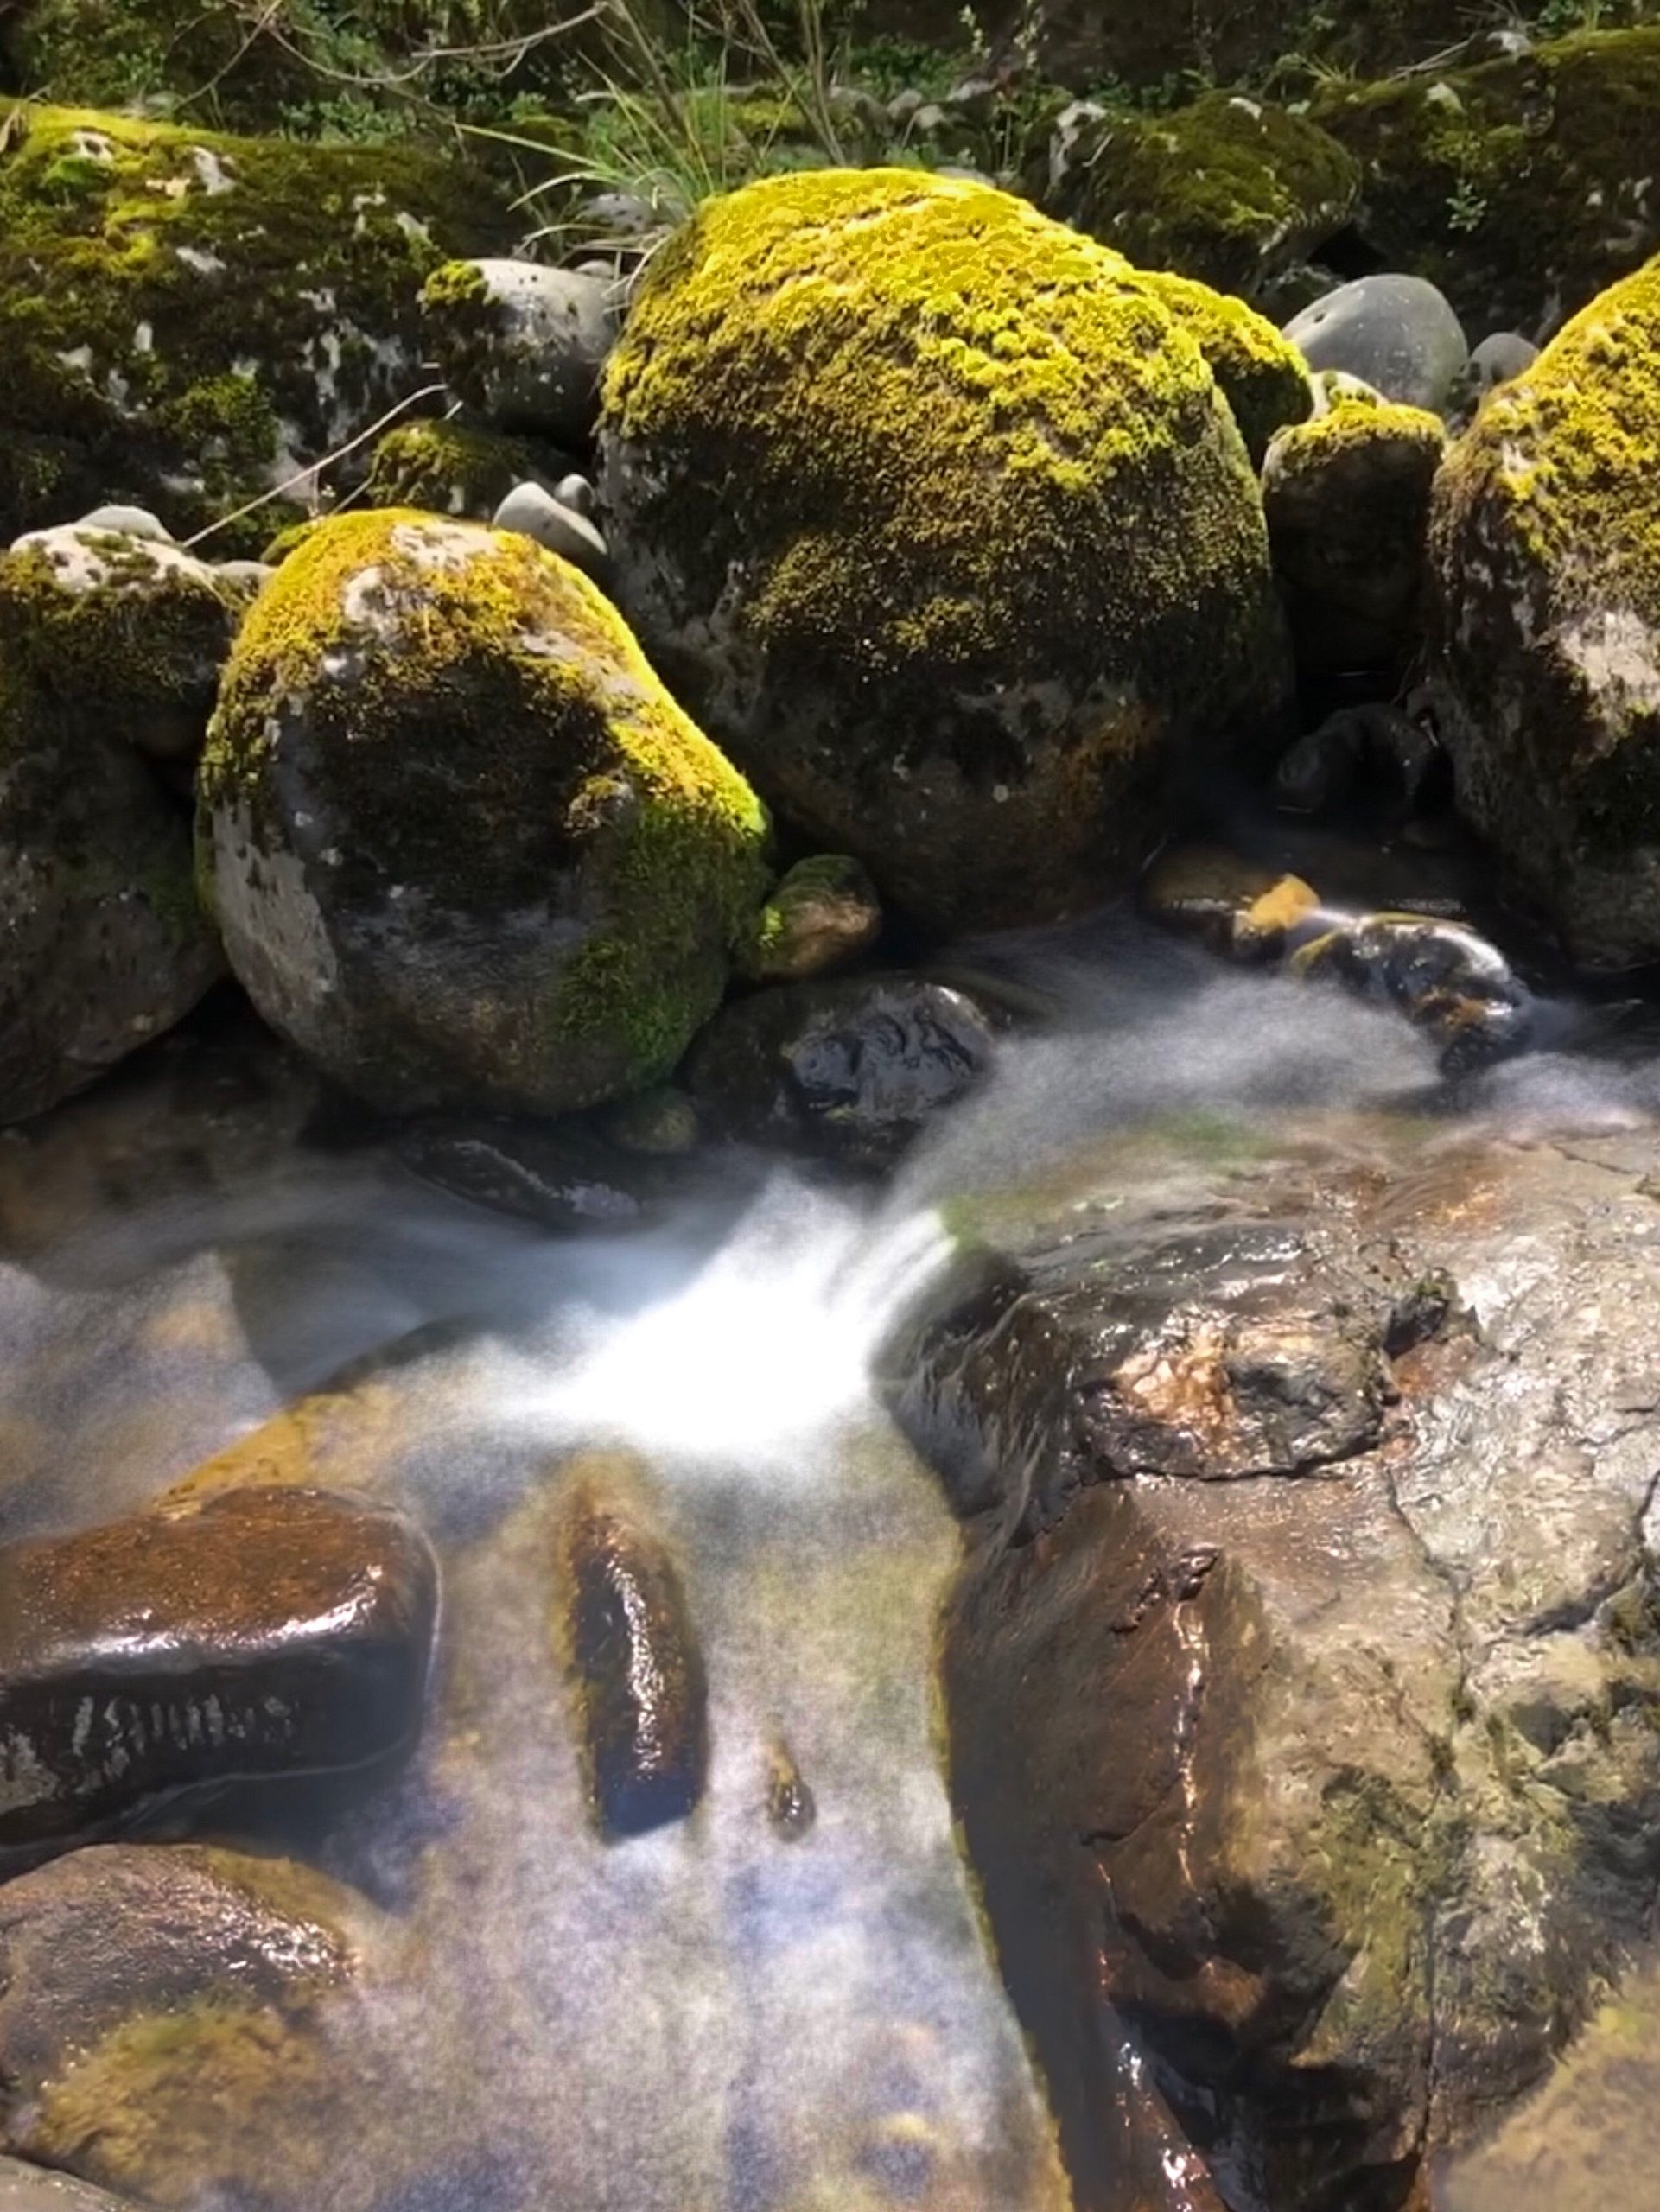
And that’s it! In four easy steps using this iPhone photography hack you can get your photo of a waterfall looking similar to what a DSLR is capable of producing.
After that, you can use whatever editing apps you wish to further enhance your photo.
I’d highly recommend using either Lightroom or Snapseed for your iPhone photography editing.
